We specialize in hard to find items

All Categories


Ceiling Fan Switch Zing Ear ZE-109,Two-Wire On-Off Light Switch for Hunter Ceiling Fans Lamp and Wall Lights Replacement (Bronze Pull Chain)
Share Tweet
*Price and Stocks may change without prior notice
*Packaging of actual item may differ from photo shown
- Electrical items MAY be 110 volts.
- 7 Day Return Policy
- All products are genuine and original
- Cash On Delivery/Cash Upon Pickup Available


Ceiling Fan Switch Zing Ear ZE-109,Two-Wire On-Off Features
-
Zing Ear ZE-109 Two-wire pull chain switch, activates canopy lamps by gently tugging the beaded chain, compatible with most ceiling fans or fan lights.
-
Get Ceiling Fan Parts Certifications: CSA certified (Canada)-UL approved (USA)
-
Ceiling Fan Switch Electrical Rating:maximum of 3-amps at 250-volts or 6-amps at 125-volts.
-
Pull chain switch use high quality metal up shell material,not easy to rust.
-
If you have any quality problems, please contact us, we will definitely return or exchange the goods.
About Ceiling Fan Switch Zing Ear ZE-109,Two-Wire On-Off
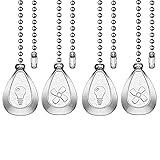
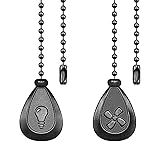
This ceiling fan pull chain set fits ANY ceiling fan PERFECTLY! Large ceiling fans, contemporary ceiling fans, outdoor ceiling fans and more! Product specifications: Material: Copper Length of pull chains: 10 Centimeters Diameter of each bead: 3.0mm: Electrical Rating: 3A at 125VAC -- 1A at 250VAC 1, Before installation, please turn off the ceiling fan power 2, Please be sure pull chain does not interfere with fan blades or rest against lamps or glass. 3. Make sure to write down the position of all wires that you disconnect in the process of removing the switch. 4.Then insert the tinned wires in the same order as removed into the new switch.