We specialize in hard to find items

All Categories


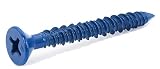
(2500pcs) 1/4 X 1-1/4 Slot Indented Hex Washer Head Concrete Screws, Bulk/Wholesale Carton - Blue - Ships Free in USA
Share Tweet


(2500pcs) 1/4 X 1-1/4 Slot Indented Hex Washer Head Features
-
1/4"X1-1/4"
-
Slotted Hex Indented Washer Head Tapcon Style
-
Hardened Heat Treated Steel
-
Blue Ruspert Corrosion Resistant Finish
-
500 Hour Salt Spray Rating
About (2500pcs) 1/4 X 1-1/4 Slot Indented Hex Washer Head
SLOT Indented Hex Washer Head Tapcon Style CONCRETE SCREWS, Heat Treated DIAMOND POINT, BLUE Ruspert 500 Hour Salt Spray Rating Concrete Screw Installation Calculate the correct length of screw to use before installation. The minimum length screw to use is determined by adding the thickness of the material being fastened to the minimum embedment of 1 inch. The maximum length of screw to use is determined by adding 1-3/4 inches to the thickness of the material being fastened. Once you know the dimensions of the screw use a hammer drill and correct ANSI standard carbide drill bit. The hammer drill must be in the hammer and rotation mode before starting to drill.. Drill a hole to the proper depth. Drill a hole to a depth at least 1/2? deeper than the screw will penetrate. Set the depth gauge provided with the hammer drill to the required depth. If a depth gauge is not available, wrap tape around the bit at the correct embedment depth. Prepare the hole for installation. Using a wire brush, compressed air and/or a vacuum, clean the hole of all dust and debris. Insert the concrete screw, first through the fixture then into the hole. Turn clockwise by hand or with a power tool using the correct driver. The concrete screw is properly set once the head of the concrete screw is securely fixed against the fixture. Make sure that the screw is not allowed to strip the threads in the substrate by avoiding over-torqueing. Turning the screw by hand the last couple of revolutions can help to prevent this. It also ensures that the screw is tight against the surface of the material being fastened. To avoid head shearing and or stripping consider the following: Drill the hole deep enough to avoid the screw from bottoming out in the hole. Clean out and the debris from the hole. Do not apply too much torque. Turn the screw by hand the last couple of revolutions.