We specialize in hard to find items

 (1)
(1)


PIAOCAIYIN Lab Drying Draining Racks, 27 Pegs Drying Rack for Lab Supply, PP Laboratory Drying Rack for Draining & Drying Test Tubes, Beakers
Share Tweet


PIAOCAIYIN Lab Drying Draining Racks, 27 Pegs Features
-
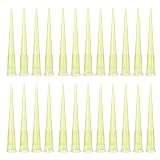
【Large Capacity】Lab drying racks have 27 pegs on one side, which can be adapted to different sizes and shapes of containers, such as beakers, test tubes, volumetric flasks, etc., which can be widely used in laboratories, medical treatment, chemical industry, quality inspection, schools, scientific research institutes and other fields.
-
【Durable Performance】Laboratory drying rack is made of high quality PP, after injection molding technology to make it high strength, wear-resistant and durable. Stable base, high quality material and sturdy wall mounting keep it balanced and not tilted even when hanging full of lab instruments, strong stability.
-
【Efficient Drainage】Laboratory rack: adopts slant pile, catch basin design, drain hole design and 23.62 inches drain pipe which is favorable for drainage, ensures the rapid drainage of water, shortens the drying time of the experimental setup and improves the experimental efficiency.
-
【Save Space】Lab drying draining racks overall compact structure, small footprint (21.65*15.75 inches), effective use of vertical space, can greatly save the space of the laboratory bench, make the laboratory environment more neat and orderly.
-
【Easy Installation】We this lab drying racks simple structure, complete accessories, snap-on installation. The mounting brackets and holes allow you to easily and securely mount it on the wall.
About PIAOCAIYIN Lab Drying Draining Racks, 27 Pegs
Specifications Style: Modern Shape: Rectangular Color: Grey Material: PP Surface Treatment: Injection Molding Mount Type: Wall Mount, Self-standing, Desktop Assembly Required: Yes Indoor/Outdoor Usage: Indoor Number of Pegs: 27 Number of Items: 2 Drainpipe Length: 60 cm/ 23.62 in Each Peg Length: 13.8 cm/ 5.43 in Each Peg Bottom Diameter: 1.1 cm/ 0.43 in Each Peg Top Diameter: 0.73 cm/ 0.29 in Gross Weight: 4.11kg/ 9.06 lbs Product Size (L*W): 55*40cm/ 21.65*15.75 in Package Size: 57*16*43cm/ 22.44*6.3*16.93 in Package Included 2* Lab Drying Draining Racks Other Accessories Required for Installation How to Install 1.Attach the upper mounting clip to the wall with expansion screws. 2.Hang the mainboard on the mounting bracket and fix it with plastic fixing screws. (Note: please do not insert the plastic fixing screw insert first, insert the insert to fix it at the end when the installation is finished) 3.Install the middle and lower mounting clip. After finding a good position, first use expansion screws to fix it on the wall, and then use plastic fixing screws to fix it with the main board. 4.Install the bottom bracket. Find a good position and then put the expansion screws on the wall, then use the plastic fixing screws to fix it with the main board, and finally use the screws to fix it on the expansion screws (Note: Please choose one of the installation methods in steps 3 and 4. It cannot be installed at the same time. Before installation, please install the drip rods and drainage pipe.)