All Categories


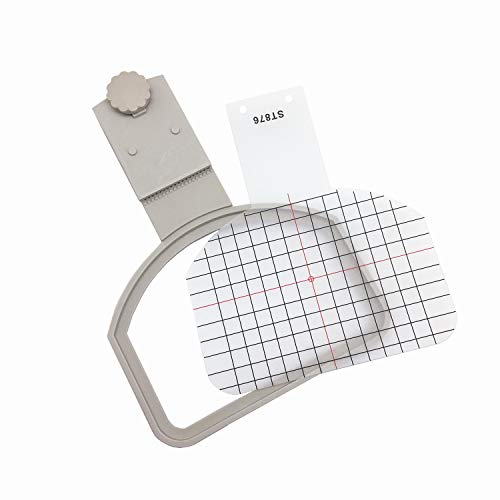
YEQIN Universal Cap/Hat Hoop, Embroidery Machine Cap Hoop for Brother Babylock Singer Bernina Janome Singer Husqvarna Viking Pfaff
Share Tweet
Get it between 2025-09-19 to 2025-09-26. Additional 3 business days for provincial shipping.
*Price and Stocks may change without prior notice
*Packaging of actual item may differ from photo shown
- Electrical items MAY be 110 volts.
- 7 Day Return Policy
- All products are genuine and original
- Cash On Delivery/Cash Upon Pickup Available


YEQIN Universal Cap/Hat Hoop, Embroidery Machine Features
-
Universal Cap/Hat Hoop
-
Size: 5.25'' x 4.5''(133*114mm)
-
this hoop will make your job easier for embroidering on hats. its designed to work with your existing 4x4 hoop or larger (not included). PE770
-
Brother 700 750D 770, 780D / Simplicity SE2 , SE3, All White Embroidery Machines / Bernina Deco 500, Deco 600 Brother PE100, PE150, PE200, PE180
-
Embroidery Machine Cap Hoop for Brother Babylock Singer Bernina Janome Singer Husqvarna Viking Pfaff
About YEQIN Universal Cap/Hat Hoop, Embroidery Machine
Ready to Be Embroidered on in Seven Simple Steps Easy and convenient the baseball cap can be hooped and ready to be embroidered on in seven simple steps. - Step 1 - Pull shiny backing off of adhesive stabilizer. Adhere to the bottom of the Cap Hoopster. Make sure the stabilizer is taught and firmly attached to the Cap Hoop, allowing it to wrap around the edges of the Cap Hoopster if necessary. - Step 2 - Determine where design should go onto the cap. The use of a water-soluble pin will help center design. Just make sure a vertical and horizontal line intersecting at the center point of the design. - Step 3 - Loosen visor clamp by turning thumbscrew. Attach clear template with two holes to the two small pegs on the visor clamp. Loosen back strap on cap and slide the visor under the template and visor clamp. Center the area of the cap that will be embroidered. The markings on the cap and the template will help you to do this. - Step 4 - Make sure sweat band is pulled back before you tighten down on thumbscrew. a) You must prevent the sweatband from being stitched to the cap. Taping or pinning the sweat band may be necessary. b) Stand-up buckram (a non-fused backing) must be pulled back with sweatband. Cutting buckram liner an inch or two on each side, where it is stitched to the visor, will allow it to be pulled back neatly. - Step 5 - Press the cap down against the adhesive backing starting in the middle and working out. The cap must be as flat and smooth as possible. - Step 6 - Clamp the Cap Hoopster to the outer machine hoop on the side opposite where the machine hoop attaches to the embroidery unit. - Step 7 - Turn your machine on and set it up for embroidery as usual. Turn embroidery unit on and attach attach machine hoop. You may have to remove the foot and/or shank to do this. Use curser keys to center needle and begin to embroider designs onto the cap. Remember, design must be rotated clockw


 (2)
(2)


